Well it seems a while since I posted on the completion of principle photography for ‘The Lighthouse’ so I thought I’d update you on it’s progress. It was officially released in July 2016 by ‘Soda’, the distributor and being a Welsh story it enjoyed a good theatrical run in Wales. It showed in cinemas across the whole of Wales for about 6 weeks which is terrific. Sadly, as is often the case for indie films, it was deemed that a UK or international theatrical release was not financially viable so it went straight to DVD after the Welsh release. This is sad as ‘The Lighthouse’ is really a cinema film, it has a visual and sound space that gets under your skin when experienced in the scale that a cinema offers. I can see it’s a hard sell but, and I know I’m biased, it seems a waste as ‘The Lighthouse’ is a pretty good story and a slow-burning cauldron that leaves you exhausted by the end. It’s a shame that distributors are so risk averse but that is the way it is now. If you fancy watching it you can find it on Amazon or BFI to hire or buy as well as on DVD from all the usual suspects. I’ve been told it’s available on SKY Movies also but haven’t checked. In the mean time here are a couple of extracts for you to watch. The first is a montage of the film that sort of follows the narrative and the second are a few full scenes. Hope you enjoy them.
Blogs
Never discuss politics, religion or lenses
Unless you have a lot of time and are prepared to come to blows. Any member of the camera team will willingly sell their grandmother if it helps prove a point about one lens being better than another. It’s like the football of cinematographers, we all side with a make or generation of lens and will defend it to the last – thinking about it I should get some shirts made up and start cashing in on the merchandising. I’ve always had a split loyalty – which in itself is heresy – between master primes and Cooke S4’s. I love the master primes for their technical genius and the uncompromisingly sharp wide stop, the S4’s for the character that they offer – the romantic feel to the colours and highlights. They’re not soft, just forgiving and pleasing. However there is a new cowboy in town and I liked them so much I bought a set (with my business partner Zoran Veljkovic at Upsidedown Films). They are from a German manufacturer called Hannes Inno Tech and they have come up with a range of lenses called Celere HS.

Celere HS lenses

Celere HS lenses

The Celere on our RED Dragon

Cintek designed and made this case for the Celere set which will soon have an 18mm and a 135mm ( I hope)
Every time I get them out I’m asked a hundred questions about them so I thought I’d write up my findings and share them with whoever fancies a nerdy read. Firstly I want to be clear that I am not paid by or in league in any fashion at all with Hannes Inno Tech. Secondly I bought a set rather than hire them as (a) they are hard to get hold of and (b) they are affordable. Buying a set of master primes is not an option!
I’ll start by summarising what I like about them then look at the tests and finally the real world shooting experiences. For me they are a combination of the master prime and the S4’s. They are all T1.5 and sharp wide open (except our 25mm which I’m happier with at T2). They have a nice feel to the highlights with no halo or smearing around extreme bright spots and the drop off of focus feels good. We have a RED Dragon so the fact that they are full frame is important and there are nice little design features like they are all the same weight and size so swinging a lens on Steadicam requires no rebalance. I also like the company’s ambitions. They are developing additional elements to give us even more tools like uncoated interchangeable front elements and there is a clamping plate in the mount so you can stretch a net easily if required. They are just nice touches that help us adapt more easily to different looks. Are they as sharp as the master primes wide open? Probably not although I haven’t tested for this, are they as great as the Cooke S4’s with skin tones? I don’t know but what I do know is that they offer elements of both and I’ve found the combination of these characteristics to give really great pictures. As a disclaimer – all the framegrabs on this page are from prorez transcodes or compressed films not from rushes.

Shot on the Celere HS lenses. These are taken from prorez transcodes with a rec 709 LUT applied

Celere HS lens on RED Dragon at 5K HD 6:1. Framegrab taken from prorez transcode

Celere HS lens on Sony FS7

Celere HS lens on Sony FS7
We, I think, had one of the first sets in the UK and spent some time testing before we took them out. We looked at each stop on each lens and tried to use a mix of textures and colours. We did sharpness test etc separately and the lenses passed with flying colours – except as I mentioned the 25mm which was not as sharp as the others – so these tests were purely about the ‘look’ of the lens. To complete the tests at the highest resolution we put the EF mounts on and used a 5Dii. The picture profile was set to the most neutral setting possible and focus set to the teeth on the skull. Here are a selection of the frames from the 36mm. These are high rez jpegs.
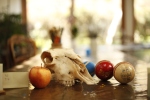
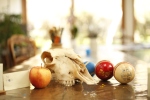

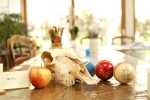


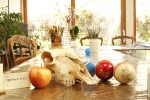
I’ll let you draw your own conclusions but for me I like the way the focus drops off, it is not a harsh look but pleasing and gentle. The colours hold nicely in the soft areas and the highlights offer texture without losing contrast. I made these tests primarily with a feature I was about to shoot in mind. The feature was mainly exterior and based in a small village in Spain which is why I was so interested in highlight detail. For me the sweet spot of all the lenses was between 2.8 and 4 and I stuck to this stop range for most of the shoot. (see my previous blog ‘Experience doesn’t buy you perfection’ for more info on that shoot)

Shot on the Celere HS lenses. These are taken from prorez transcodes with a rec 709 LUT applied

Nice flare in the evening sun. I found the lenses to give enough flare when wanted but not flare constantly

Shot on the Celere HS lenses. These are taken from prorez transcodes with a rec 709 LUT applied

The Celere lenses coped very well with wide white spaces and small areas of colour
But for some of the night scenes where we needed to light a larger area with our slightly under resourced lighting package the speed of the lenses really helped

Shot on the Celere HS lenses. These are taken from prorez transcodes with a rec 709 LUT applied

Shot on the Celere HS lenses. These are taken from prorez transcodes with a rec 709 LUT applied

Shot on the Celere HS lenses. These are taken from prorez transcodes with a rec 709 LUT applied

Shot on the Celere HS lenses. These are taken from prorez transcodes with a rec 709 LUT applied
I must at this point I must also reveal that we have had some build problems with the lenses. I believe that this is in part due to us having some of the very first off the production line. On the feature the 36mm seized up completely. This obviously made life very difficult! Again I must claim no allegiance to a company, this time Cintek. We bought our lenses from Cintek who are the UK distributer for the Celere HS. They reacted very quickly to the problem and despite us shooting in a tiny village in Spain they managed to get us a replacement on set within 48hrs. It is reassuring that when problems occur there is proper backup and Cintek couldn’t have performed better. The same happened to our 85mm a few months later, that was also dealt with very quickly and now all are in good shape. It is a worry that these problems have occurred but I believe that can be the lot for early adopters.
I can fart on for ever about the details and idiosyncrasies of lenses but actually it’s probably not that helpful. Lenses are such a personal thing for a cinematographer, they effect the look more directly than the camera body (which is why I need to start merchandising those T shirts). Ok, so there is an inherent difference between film and digital but I would argue that most serious digital formats that are taken to a decent grade end up being pretty much indistinguishable. You might make a decision based on whether you are mainly low light or in an environment you can’t control but not on how skin tones are rendered or contrast held, these are hewn in the optics. I can more easily distinguish between a film shot on an ARRI lens or a Cooke lens than an Alexa body or a RED body. So as lenses are such a personal choice I’ll talk briefly about why I choose to use the Celere lenses on a few projects and then let you see the results so that you can decide if they work for you.

Celere HS lens on Sony FS7

Celere HS lens on Sony FS7

Celere HS lens on Sony FS7

Celere HS lens on Sony FS7
Virgin Active – Iron Zuu – Camera body Sony FS7.
This was actually the first thing I shot on these lenses. It was a low-mid budget spot and so I would have been hard pressed to get a set of master primes in – come to think of it I don’t even know if an FS7 can take PL lenses? The choices would more likely have been ARRI CP2’s or Cooke minis or maybe Xeens. I’ve not used the minis or Xeens much so can’t really comment on them but the Celeres blow the CP2’s out of the water, I should mention that I hate the CP2’s – they are unwieldy, slow (you always have to light for the slowest lens) and uninteresting – in my humble opinion. It was also a great opportunity to get the Celeres out. I knew we were backlighting with some haze and I wanted a lens that would flare but could be controlled when needed. It’s tempting when you want flare to use some vintage lenses but you can run the risk of losing a lot of time controlling the flare when you don’t want it. I should know! We have a set of 1980’s rehoused Nikkor lenses that are beautiful but pick up flare very easily. If we didn’t have the Celeres I would probably have used the Nikkors on this job but the Celeres did a marvellous job.
Dudley Dog Films – Solo – Camera body RED Dragon.
Solo is a music based feel good coming of age feature film. It’s low budget and set in Spain. If I’m honest with you I originally used the Celeres for budget reasons and if someone had come up to me and offered a set of Cookes I would certainly have taken them. However they didn’t and it was the Celeres that came with us. It gave me 4 weeks to really get to know them and I have to say really enjoy them. I found that even in the intense sun of Spain the contrast levels were pleasing and the colours vibrant. The pictures felt natural and the bright kicks all around never caused us any problems. As I mentioned before the T1.5 helped us out when the proverbial hit the fan and so far everybody has been very complimentary about the pictures. I shot the film mostly in 4K but if I just wanted to get a slightly wider frame and time was short I’d just go to 5 or 6K which uses more of the sensor. This was only possible as the lenses are full frame and was a great benefit. I can’t put any moving image here as the trailer is not cut yet but here are some framegrabs.

Shot on the Celere HS lenses. These are taken from prorez transcodes with a rec 709 LUT applied

Shot on the Celere HS lenses. These are taken from prorez transcodes with a rec 709 LUT applied

Shot on the Celere HS lenses. These are taken from prorez transcodes with a rec 709 LUT applied

Shot on the Celere HS lenses. These are taken from prorez transcodes with a rec 709 LUT applied

Shot on the Celere HS lenses. These are taken from prorez transcodes with a rec 709 LUT applied

Shot on the Celere HS lenses. These are taken from prorez transcodes with a rec 709 LUT applied

Lenses coped well with detail in back lit set ups

Shot on the Celere HS lenses. These are taken from prorez transcodes with a rec 709 LUT applied

Shot on the Celere HS lenses. These are taken from prorez transcodes with a rec 709 LUT applied

Shot on the Celere HS lenses. These are taken from prorez transcodes with a rec 709 LUT applied

Nice flare in the evening sun. I found the lenses to give enough flare when wanted but not flare constantly
Schripps (Travel Channel) – Henry Cole bumpers – Camera body RED Dragon.

BTS Henry Cole Trail

BTS Henry Cole Trail
As I write this is the most recent thing I’ve shot on the Celeres. It is also standout in the sense that the budget was good and I could have chosen any lens package that I wanted. The bumpers were all based around the light-hearted gag of making the audience think we were on holiday and then revealing we are actually in Henry’s work shed. I would normally have used S4’s for this project but one of the stories required us to shoot in a water tank that was smaller than we really needed.

Celere HS lens on RED Dragon at 5K HD 6:1. Framegrab taken from prorez transcode

Celere HS lens on RED Dragon at 5K HD 6:1. Framegrab taken from prorez transcode

Celere HS lens on RED Dragon at 5K HD 6:1. Framegrab taken from prorez transcode

Celere HS lens on RED Dragon at 5K HD 6:1. Framegrab taken from prorez transcode

Celere HS lens on RED Dragon at 5K HD 6:1. Framegrab taken from prorez transcode

Celere HS lens on RED Dragon at 5K HD 6:1. Framegrab taken from prorez transcode

Celere HS lens on RED Dragon at 5K HD 6:1. Framegrab taken from prorez transcode

Celere HS lens on RED Dragon at 5K HD 6:1. Framegrab taken from prorez transcode

Celere HS lens on RED Dragon at 5K HD 6:1. Framegrab taken from prorez transcode
For this to work I needed to use as shallow a depth of field as possible and the Celeres open to T1.5 versus the T2.1 of the Cookes. Master primes are a little too clinical for this type of shoot, what I needed was something that bridged the two, warm and gentle but fast. The Celeres fit this. Again I’m not claiming that they are as amazing as S4’s for skin tones or as perfect as master primes in engineering but the combination of a bit of both is for me a real winner and I look forward to shooting a lot on them in the future. Here are the bumpers for you to check.
Experience doesn’t buy you perfection,
it just reduces the risk of monumental cock ups. It’s not a popular opinion but I believe it to be true. I’m always surprised when people talk about a problem they had on a shoot and then to impress on how bad it was they finish with “…and they are so experienced”. The disastrous event normally has its roots in one of two roads; 1. A moment of gross stupidity – which I have to say we all have or 2. The person is very experienced but just not in what they are doing. You might have, for instance, an experienced commercials DoP who is on their first food shoot (you know who you are – I’ll not name names), or first stereoscopic, or first beauty, or first high speed….the list goes on to eternity. I only say this as I have just completed my fifth feature film which is called Solo. Solo is also a first for me, it’s a light hearted music based feel good film set in the bright hot sunny country of Spain. My four previous films have been very dark, both in the subject matter and the pictures. So I am an experienced DoP but this was very much a new area for me and full of monumental cock up opportunities. In my favour I had the 4 day recce to start getting to grips with how the sun looked in the small village of Barx, where we were shooting. The recce started and finished with, as Jonathan the writer and producer called it, ‘an almost unheard of’ blanket of cloud – and he should know as he lives in Barx!

What would I do without Sun Surveyor, especially on days like this on the recce

I’d like to say the clouds rolled in but they were already there!
With that gone the only thing left was the old mantra of test, test and test again. Apart from looking at as many types of bounce board as possible and having my eye almost surgically attached to the sun’s position the other main factor I wanted to know inside out was how the lenses would respond to the contrast levels. I had just bought a set of Celere lenses by the German engineers Hans Inno Tech – I think I had the first full set in the UK – and had used them on a couple of commercials but nothing longer. I knew I really liked the look but still didn’t know all of their characteristics so tested for sharps (at all stops), colour rendition (especially when backlit) and contrast.

The Celere lenses held highlights really well and I felt that this stop of 4 was about perfect for Solo. 85mm T4

The Celere lenses held highlights really well and I felt that this stop of 4 was about perfect for Solo. 50mm T4

The Celere lenses held highlights really well and I felt that this stop of 4 was about perfect for Solo. 25mm T4

The Celere lenses held highlights really well and I felt that this stop of 4 was about perfect for Solo. 36mm T4
They responded very well and I was especially happy with how bright backgrounds held detail with very little ‘smudging’ on the edges of contrast areas. For Solo this was going to be important as many of the background walls were white or bright colours. The village of Barx was also to become one of the characters of the film, it has a life and energy that we wanted to embrace and flow out of the pictures and so pushing the backgrounds out of focus all the time wasn’t appropriate which meant holding the contrast was even more important. With this in mind and having confirmed with the tests I decided a stop of T4 was about right and that’s what we shot at least 90% of the film at. The shoot went very well – and it’s not often I say that. Without doubt I can consider myself ‘more experienced’ in the highs and lows of shooting predominantly exterior locations in a sunny spot but what if anything was the main lesson? It has to be ‘don’t fight the sun, you will never win’. Whatever you throw at it all you will do is make the result ‘less bad’, and I’m coming at this from the stand point of Solo being feel good – ie, the cast have to look beautiful. Silks were an enormous help to reduce harsh shadows but the light still wasn’t ideal with the light being both top-ey and uninteresting. What we had, which was the saving grace, was an enormously flexible production team headed by the lovely Sukey who really worked the scheduling around where the sun was. I’m eternally grateful for all the constant tweaks and moves that weren’t ideal for production but allowed us to keep control of the light.

Ash set the tone in the first week for Aggie to continue

The majestic mountains around Barx

I spent my whole time staring at the sun!

Silks came in very handy

Aggie ran a tight ship in a sassie hat

Despite all efforts gradually the camera accumulated stuff

The village turned out in force to help with our final scene

The village turned out in force to help with our final scene

The Celere lenses coped very well with wide white spaces and small areas of colour

Lenses coped well with detail in back lit set ups
Nice flare in the evening sun. I found the lenses to give enough flare when wanted but not flare constantly
The Celere lenses coped very well with wide white spaces and small areas of colour

Lenses coped well with detail in back lit set ups
Always one of the pleasures of gaining new experience and learning new systems that work for you is the relief you feel at the end that it didn’t all go ‘tits up’. Luckily the potential for monumental cock ups remained only a potential and never developed to a situation where you had to try and blame someone else. But why is that? What is it that stops that happening, well for my tuppence worth, it starts with all the testing so that at least you know some boundaries but more important than that is having an atmosphere on set where people aren’t afraid to ask questions. It goes without saying that the director on Solo, Nic Cornwall, is a terrific director who can bring the story and characters to life with style and feeling but what he also adds is that atmosphere on set where we are all comfortable to ask for what we need. Nic is a master at empowering cast and crew to do this and it not only creates a rather lovely environment to work in but also reduces the chance of poor decision making. I was fortunate that my camera team embraced this and worked so well as a unit. Ashley Bond, a phenomenal focus puller, came in for the first week to set up the team and get things running smoothly whilst also taking charge of the drone team and stepping into 2nd unit Dop when needed. He handed over to Aggie Balogh who not only continued with Ashley’s open but structured set up but built on it and the team delivered an outstanding result. I won’t mention you all but you know who you are and I hold you all in the highest esteem.

The rocking camera crew on wrap

Happy faces on wrap, Nic Cornwall on right with the mayor of the village and writer/producer Jonathan Hall
I’ll finish this with my take on the experience v’s cock ups conundrum. I expect all of my team to be, at worst, excellent at what they do. What separates the good from the exceptional is not their key skill (focus pulling for instance) but their ability to create an atmosphere of structure, calmness and most importantly openness. It is this ability that is the root to avoiding catastrophic errors and one that I always look for in the team that works with me.
If you want to keep up with Solo please check out and like the facebook page https://www.facebook.com/solothemusical/
Who gets to say what is big?
I only ask as a client recently asked me to shoot a short narrative film for Vision Express. Great, I thought, it’s always nice to shoot drama. They said, ‘it’s for projection, and it’s going to be projected big, oh and we need to shoot in a 7:1 aspect ratio’. These are easy words to say but when you actually start the prep it soon dawns that the practicalities of this combination are a challenge! So what are the main considerations? Firstly, as far as I’m aware, there is no film or sensor that comes in a 7:1 aspect ratio and therefore we are into a world of extraction – i.e. extracting a 7:1 ratio out of the centre of a taller frame. This automatically reduces the available resolution of any existing format as you are only using a proportion of the total number of pixels and to compound this was the statement that it was to be projected big. Back to that big word again, the natural question being how big is big? The answer was that the screen was to have a left – right stretch of 34 meters and a slight curve. It’s only when you see it that you realise how big 34 meters is and I’ve put a shot below to give you an idea. If you look closely you will see someone standing in front of the screen to give you scale.


I can tell you that this meets my definition of big! It used 5 projectors overlapping to keep the quality as high as possible. As for origination quality we eventually decided to shoot in spherical on my RED Dragon in 6K and the results were spectacular.
The aspect ratio also creates challenges as you lose many of the frame sizes that you normally associate with drama. For instance to see a figure from head to toe requires the camera to be about 20 meters away from the action unless you use super wide lenses. I was very much against going on the super wides as the narrative of the film required an emotional connection with the lead character and I felt the inherent distortion associated with these wide lenses would hinder that connection. We ended up using predominantly the range of 16-35mm focal lengths with the occasional straying onto 50mm or 10.5mm. Even with these lenses the bulk of our film features a greatly reduced variety of frame sizes to ‘normal’. If you think about it you probably don’t want to feature anybody closer than medium c/u where to chop the top of the head as when projected on this scale they will look monstrously big! But as we were shooting entirely on real locations we often couldn’t get wider than a wide m/s as we just couldn’t physically get far enough back. I was genuinely very concerned about how the film would cut with this reduced selection of frame sizes and the director, Spencer Carpenter (https://uk.linkedin.com/in/spencer-carpenter-13a75615), and myself carefully planned out the shot sizes of each transition between scenes to make sure they wouldn’t jar. We took frames of every single shot during the recce to try to mitigate against repetition of shot size and I think all this planning really came into its own on the very tightly packed 3 shoot day schedule.
The final steep learning curve was how to use the extraordinarily wide scope of the format, there is just so much space either side of the action and you don’t just want to use the centre of the frame as this feels like a real lost opportunity – a lost opportunity in the sense that we would be failing to use the available storytelling frame to give the audience information but also a lost opportunity by not asking the audience to engage with the far left and right sides of the frame. Both myself and Spencer wanted the audience to be forced to look left and right and we felt that this physical response of the audience would further enhance their emotional engagement. This meant less camera movement and more blocking from the actors so the camera became more a static point of view. There were 2 tracking shots at particular points of emotional energy but far less tilting and panning than I would normally have done. We also tried to use reflections in frame when characters were at introspective points of their arc. This worked visually very well and helped make full use of the breadth of the frame.


We tried to use reflections to help balance the frame

We tried to use reflections to help balance the frame


Even a wide 2 shot became only head and shoulders.

We tried not to just use the centre of the frame

We tried not to just use the centre of the frame

No need to pan, just let the characters use the frame
This was a truly collaborative affair. The client Gary Blair From Vision Express, the agency creative Paul Basson from The Events Company and of course the producer/director Spencer Carpenter from Shapshifter all worked as one creative mass to solve all the unusual predicaments that were thrown at us to make this the fantastic success that the film ended up being. I am very grateful for being invited into this team and sharing both the stresses and jubilations that came with making the film.
Joining the Dark Side
Yes I know the title might lead you in the direction of a Gordon Willis Godfather extravaganza of peering into the darkness but surprisingly for me it’s not to do with light (first time for everything as light and shade is my party piece, don’t expect to get away quickly if you ever bring up the subject!). A little known fact, when Gordon Willis first shot the study scene in Godfather 1, which was the advent of lighting from above, the studio demanded he re-shot it. Nothing hugely unusual about this but you must remember that this is Gordon Willis we are talking about and if there was something he didn’t know about exposure, it wasn’t worth knowing. He dutifully did the re-shoot and actually admitted to thinking that maybe he had overcooked it the first time, the rushes came back and they were exactly the same. He said, and I paraphrase as I wasn’t there, I tried to do it differently but just couldn’t bring myself to, I seemed to make the same decisions. There’s conviction for you. Amazingly, despite being widely considered as one of the best dop’s of his generation he never received an Oscar for an individual film – probably the only thing I have in common with him!
Anyway, I digress. So back to joining the dark side. It is my conviction that wearing other peoples shoes can be uncomfortable, it is also a conviction that you often learn the most when you are out of your comfort zone. With this in mind I occasionally like to put myself in the life of the people around me. This time I wrote, directed, DoP’d and edited a short. When shooting I have a close relationship with the director and we discuss what we both need from a scene to make it work but to spend a day in their world, seeing the issues with their eyes, really helps to build a truer understanding of what they need from me. Editing your own film could not be a blunter test of success. It’s not about whether you have the shots, I’ve been doing this long enough to know what shots I need versus what shots I want, it’s about the rhythms of performance. The shots cut, but does the energy? I’ve always known that if you have a take with a great performance nobody will give a shit if the camera move isn’t quite perfect, but sitting there in front of my AVID having to bin the take with the perfect camera move for a better performance or more compatible energy is a hard pill for me to swallow.
I think everyone who works in a world where many people contribute to make one product should step over into the dark side and spend a day in other departments. It helps you understand – both why things sometimes go wrong – but also what is possible, both of which are great lessons. I was very fortunate that a good friend and by coincidence excellent director, Nic Cornwall, also swapped sides and covered locations (by providing his kitchen to shoot in – mad fool) and more strenuously, taking care of the art department. I owe him many thanks and sadly, many beers! Many thanks also go to my excellent cast who put up with me, I think we all had a good day, well I did anyway.
Here’s the film, hope you like it.
A rush of promos
It’s funny how everything goes in cycles. For the first 9 months of this year I had hardly any trails or promos, maybe one every couple of months. Then in September BBC WorldWide asked me to shoot one in Norway for their channel BBC BRIT and since then it’s not stopped! I’ve just completed shooting another 2, one for Discovery and another for UKTV but I think that’s it now till Christmas. So let’s look at 3 that were all very different, starting with the BBC BRIT trail that kicked it all off. This was a big campaign for the Nordic region consisting of the trails, posters, give-aways and social media voting. We were promoting the latest series by the Hoff had made a tongue in cheek reality expose of his day to day life. The campaign took the shape of mimicking a nature programme that highlighted the close extinction of species but with the tag line of ‘there might only be 1000 whales, but there’s only 1 Hoff’. A good percentage of the trail was to be library footage but then we needed to shoot a body double and plates in Norway and then a greenscreen shot of the Hoff in the UK to comp onto the plates. The stills for the campaign were being shot be Kurt Stallaert, who I have to say is a really phenomenal photgrapher, and he was also asked to direct the moving image. Working with Kurt was a genuine honour and one I’d be happy to repeat any time. In Norway we shot for two days, telling two stories, one based on Whales, the other on Wolves. It’s difficult to go wrong when you are in a location as beautiful as Norway and we certainly made the most of it.

The light was fabulous

The light was fabulous

Neil Flaherty, the focus puller, and me enjoy the view

BTS Neil Flaherty, focus puller, and myself in Norway

Not being able to resist I took the Kayak out at the end of the day
We shot on a RED Dragon with Ultraprimes, mainly at 50fps. On the water we tried to keep either close to the water or high up in the sky with a drone as this helped to keep the mystery as well as disguising our body double. Sometimes drones can be overused but this was not one of those times, the shots were great and the drone was the perfect tool.
Lighting on the greenscreen element was crucial to feeling that the Hoff was on location, not in studio. We were matching a variety of weathers and times of day so each set up was very individual but the basic premise stayed constant – large overhead ambient source which we created with a 20×20 silk with 10k’s bounced into it and then large lamps bounced into poly and softened further with frames. Again it was terrific to be working with Kurt who also has an in-depth knowledge of ‘lighting to match’, it became a real team effort.

And here is one of the final film ( Whales). I can take no credit for the Whales close ups and under water shots which are all very beautiful library footage.
The next promo was for the Travel Channel and very different. It was to promote a new series by Henry Cole and again was to be shot over 2 days. The slight difficulty was that the trail was meant to happen in a 30 minute period, it was exterior based and we were forecast one day of rain and one day of clear weather. Always a nightmare for a DoP! The series concentrates on Henry and his colleague Sam going to sheds and finding valuable biking gear. The trail was a comedy based piece where an impossibly large amount of stuff comes out of a tiny shed. This was directed by Pauline Russell who I have known for many years and is always a joy to work with so I knew I was in very safe hands. We decided to shoot hand held to give it a natural feel of exploring and observing. The RED Dragon came out again, this time furnished with our trusty Nikkor rehoused cine lenses. To combat the rain/no rain situation we brought our own rain and lit the scene with one large soft source for the exteriors and a little more for when we went into the shed.

I’m really fond of the light-hearted nature of this promo and think the rain is a great addition to the atmosphere of the whole piece.
The final promo I’ll talk about today was probably the biggest set-piece for came department. It has some set extention, some greenscreen, plenty of movement, slow motion and a stadium feel. We were trailing the South African franchise of Bake Off and the idea was to make connections between baking and the olypmics, so for example oven gloves become boxing gloves, scales weights become lifting weights etc. With this style in mind we wanted the visuals to feel like a stadium so the whole trail became very back lit and flares were our friend.

We used very heavy backlight for a stadium feel

We needed absolutely zero movement on the camera so my grip got to work and made sure.
We shot on the RED/ultraprime combo which always works well for trails and at framerates up to 200fps. The spot was co-directed by Rosie Davenport from BBC World Wide and the food specialist Will Heap. Co- directors can sometimes mean a whole world of pain for DoP’s as you can get conflicting desires and end up fudging a mix but in this case it worked really well with Rosie and Will building on each others ideas. The set extension I mentioned was for an opening shot of the baking tent. We erected a marquee in the studio at Malcolm Ryan but it was still not big enough to give the Olympic feel we wanted. In addition Rosie wanted a wall of fridges on one side of the marquee, this is no problem except that they could only get one fridge that matched the Bake off specifications! So we framed up, locked off good and proper and just moved the fridge slowly and gradually up the length of the marquee. This was slightly complicated by the lighting which needed to chase in sequence from the back of the marquee up to the front. To achieve this we rigged a long line of 1K par-cans from trussing and programmed in a chase sequence which we ran each time the fridge was moved. Carlos the fx supervisor did a great job of comping all this together and then extending the marquee further. I like the final trail, it has an epic feel but still keeps its sense of playfulness. Hope you like it also.
Black light experiments
So when a client, and it has to be said, on a somewhat dodgy phone line said we want you to film some dancers in back light I thought ‘well I can do that, not too tricky’. I was just filming a spot for BBC World wide to promote Bake Off which was a heavily back lit promo, as you can see from the picture, so was smugly confident.

It was only a day or two later that I had another call and realised my school boy error of not listening properly – it was actually black light, or UV as it is more frequently referred to. This was not something that I had an enormous amount of experience in and was further complicated by the fact that it had a very short run time, was to be delivered in a VR environment at 360 and, as the producer said ‘did I mention we are shooting in Russia?’ I have been sworn to secrecy and therefore can’t talk about the client, dance troop or subject but if you’re interested I can talk about the tecce bits. We shot on the RED Dragon as with 360 you really have to shoot in a minimum of 4K and used stills lenses so that we had coverage across the large Dragon sensor. There was no focus pulling so these lenses worked well. We tested a range of focal lengths. With 360 you normally use a fisheye and an absolute minimum of 5 cameras but as this was essentially a stage show which was to be keyed into a Virtual Reality environment we thought that it might read better it we shot the scene ‘flatter’. The fisheye lenses did not really work well for this shoot as it meant being very close to the show and the perspective felt ‘wrong’ even after flattening the image. We ended up using a Nikkor 24mm for the overall performance and swinging onto a 50mm for some elements which seemed to give us the best overall coverage. The real lessons for me came in gaining a better understanding of how the reflected black light, or UV light, reads on the digital sensor. The low cut filter already on the RED Dragon was pretty good, in fact, compared to the old RED ONE it was amazing but just to be sure we also added a Tiffen 4×4 UV filter. The idea is that you need to completely cut any sensitivity to the physical UV light (frequencies below about 400nm) and so all you record is the reflected light which is within our visual register.
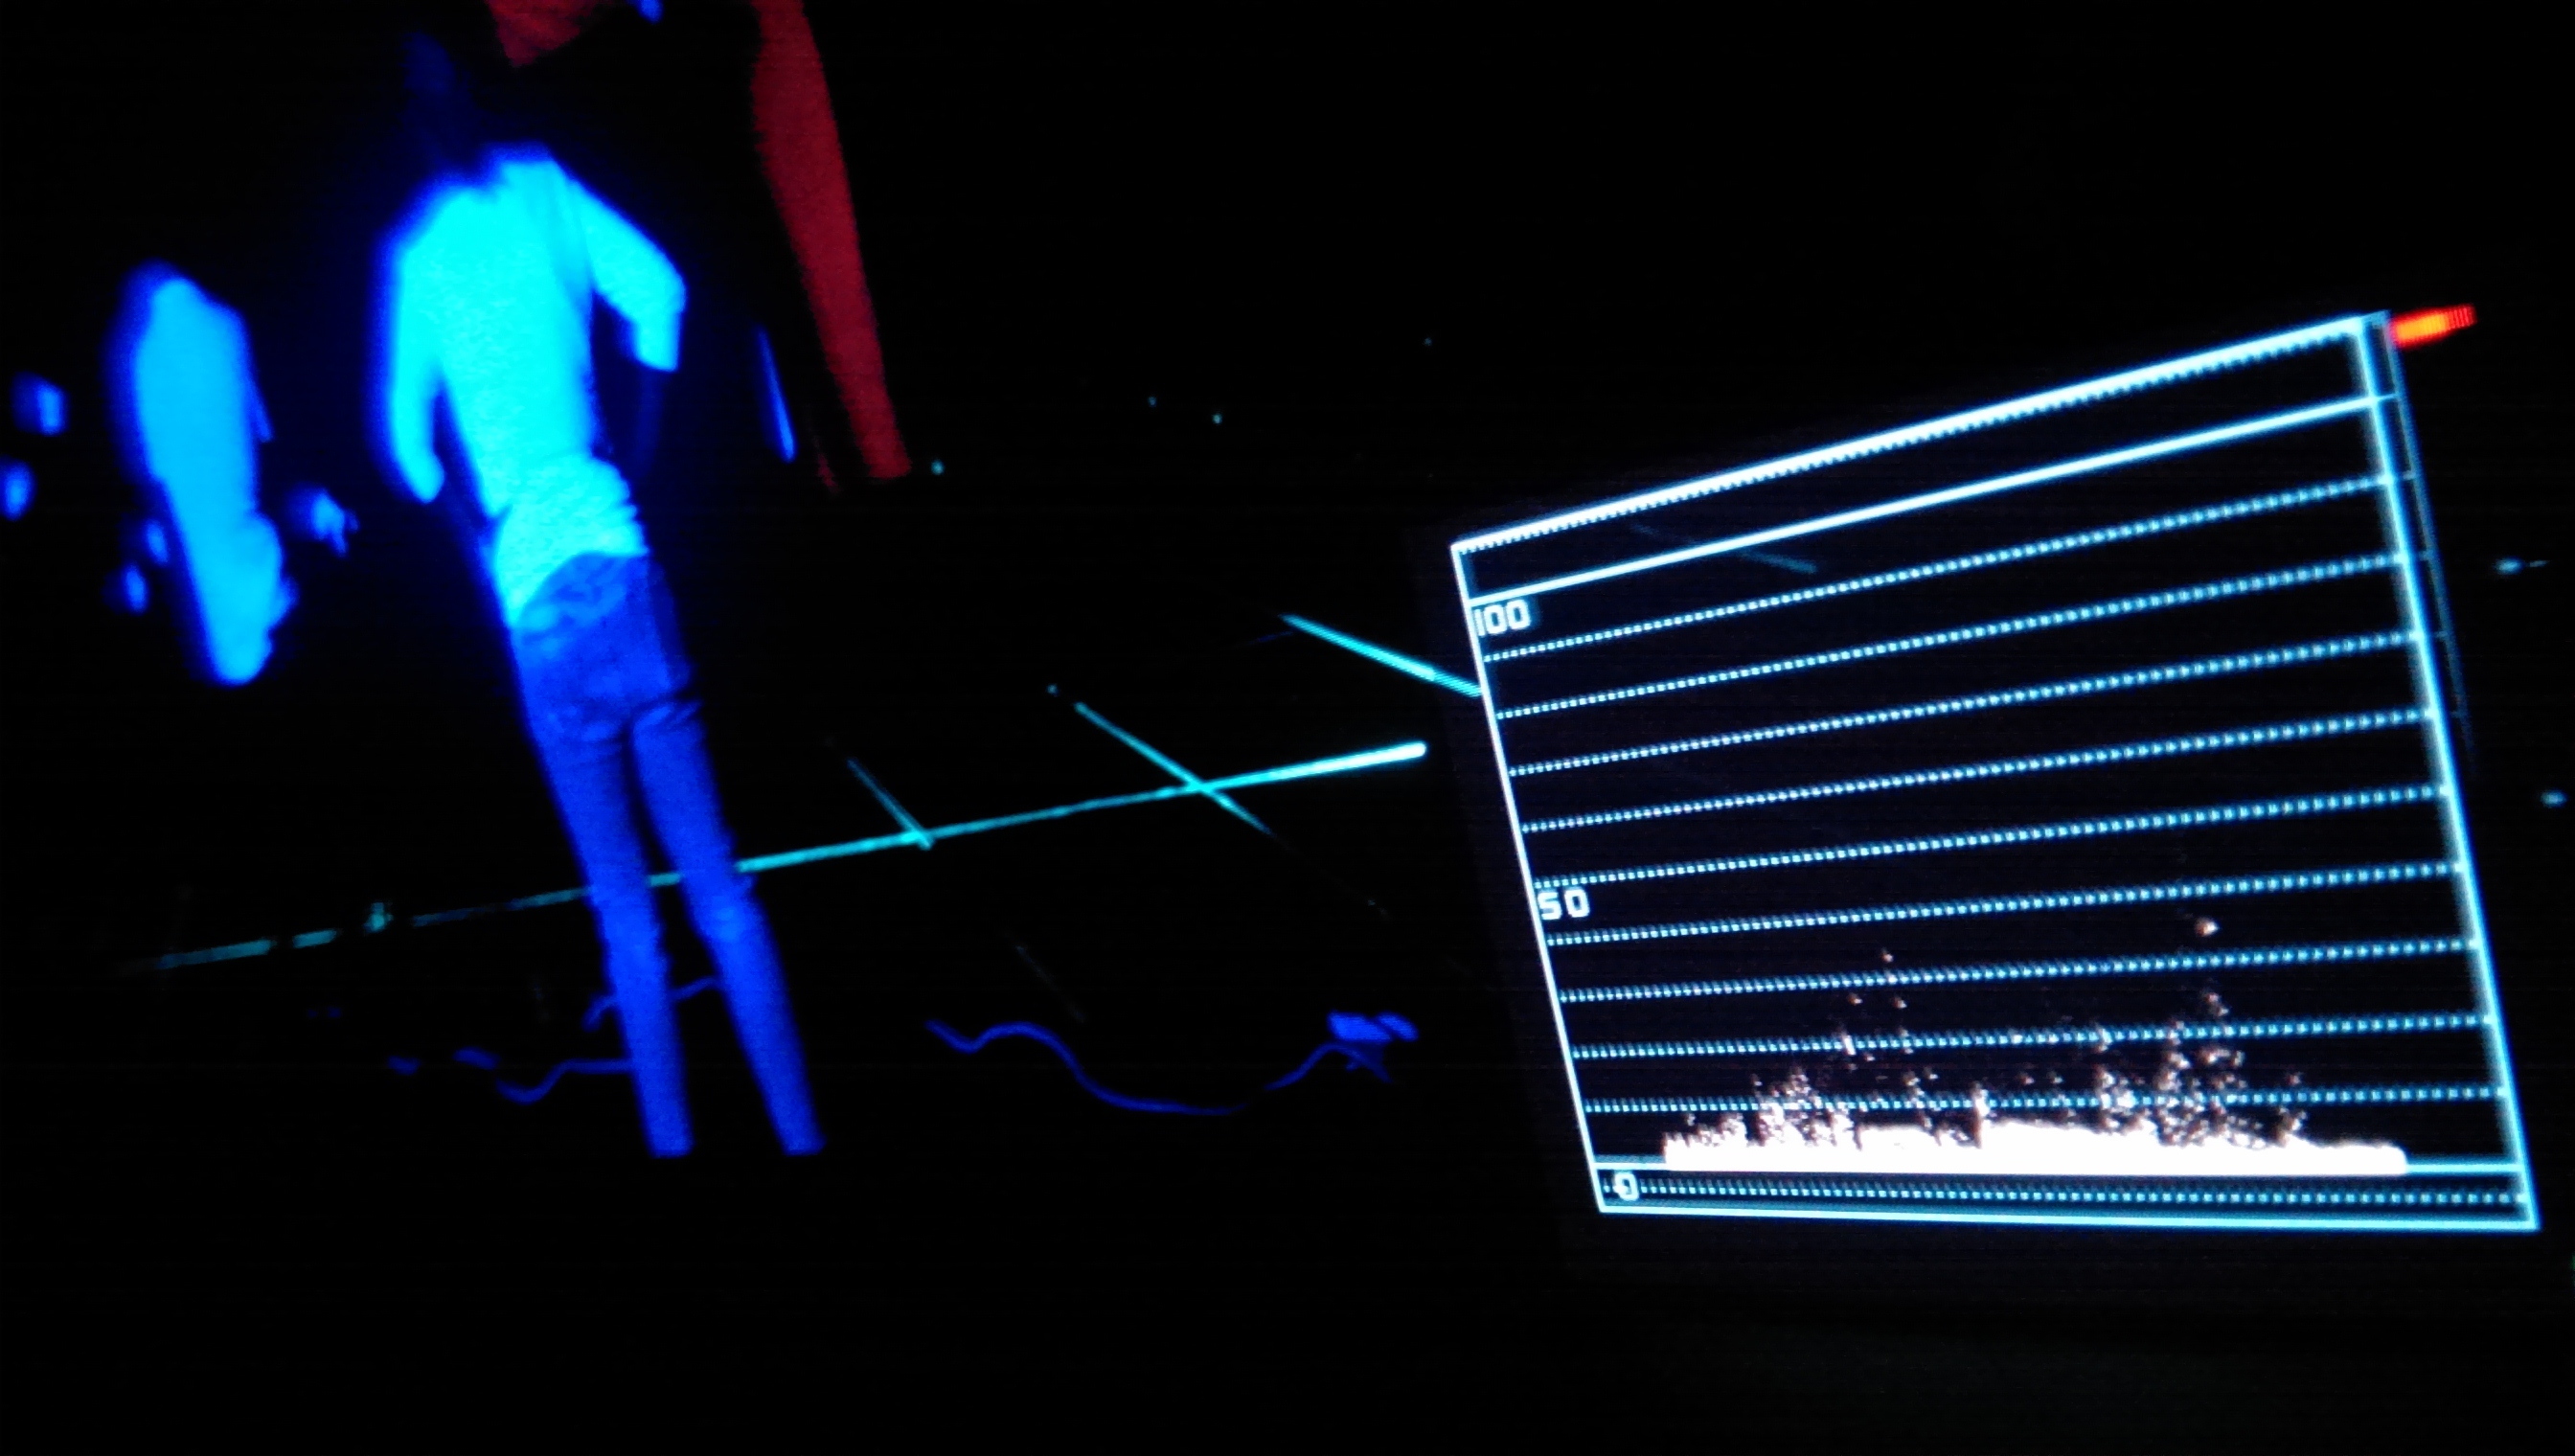
We had one day of testing before heading to Russia and this is what we discovered, UV light that reads as blue will never get above about 15% on the waveform. All that happens is that you start losing detail but the level remains stubbornly low. I had expected it to be low as it is essentially only one channel but was worried by exactly how low it was. I tried chucking more light at it but although this made a difference visually, ie some of the detail just started burning, the levels just stayed low. Other colours that combined different channels gave a higher turnout on the waveform but still was visually burning out at 35%. Here’s a picture of the monitor screen that shows the waveform and the visual appearance of the dancers.
We used 40W florescent tubes for the bulk of the lighting that was floor mounted. To try and spread the light from above we had a 400w UV softlight. This filled in the shadows above but did little else. I’m pleased to say that the film has now gone through post and the everyone is very happy. There certainly was an element of me that was still convinced that these levels would cause problems with the post process but much to my relief it was unfounded. As I’ve always said, one of the things that I love about this job is that there are always new things to learn and puzzles to solve, long may it continue!
Would you hammer a nail in with a jelly?
Well, I’m sure there is a small on-line group out there who do this exact thing but I have to confess to never having tried. I’ve always gone straight for the hammer, boring I hear you say but I stick to my guns and reply that a hammer is better than a jelly when it comes to banging in nails. This is a roundabout way of talking about using the right tools for a job. Recently there have been a huge number of new tools for camera stabilizing and aerial work which is terrific. I am lucky to be involved with a range of budgets to make films and so my path crosses a wide range of these tools, my decisions are based sometimes on budget requirements and sometimes by choice, however it’s really important to be aware of each tools limitations even if you are forced into one by budget. This is possibly going to turn into a rant but I will try to avoid it! The rant would be about people comparing the MOVI or Ronin to a steadicam. This happens all the time by people who love the Ronin and are constantly heard saying ‘oh, it’s just like a steadicam, but better’ and people who have booked a Ronin instead of a steadicam and moaning that they didn’t get that steadicam look that they wanted. I have had two projects recently, one I used a Ronin on and the other used an AR rig (posh steadicam, for those who don’t know). So why did I choose these tools? Let’s look at film 1. This was a film for RM Sotherby’s who are one of the worlds leading classic car auction houses. They asked me to film a 1960’s short wheel based Ferrari 250GT worth a cool 12 million Euros.

The star for day on this car film with the Ronin.
I designed a sequence to start the film where we followed the driver to the car to build up some atmosphere. Great idea I thought, then I saw the budget and more importantly, the time we had with the car. So in my budget I could afford either a steadicam and 1 camera or a Ronin and 2 cameras. Lets talk briefly about what each tool can offer. The steadicam is an excellent tool that gives smooth and precise movement in pretty much any direction but it is limited in range of height, you can either go low mode and have knee height to chest or high mode and have waist to head, but not both in one shot (unless you use the AR rig, more of that later). Also it takes at least an hour to set and balance. The Ronin is very flexible but there is a very definite up/down movement as the operator walks which is extremely difficult to lose. This is normally disguised if there are people moving in shot but can look terrible if you are just tracking past inanimate objects. It is quick to set up but generally less precise.
So rewind to film 1. Here it is, apologies for the text start and end, it’s an approval version.
We went with the Ronin as the second camera that I could then afford gave as more options for the driving shots we also needed. For the Ronin sequence nearly all the shots had a person in so the up/down movement was disguised. If you look at the shot before the end of the opening sequence where the camera tracks around the car you can definitely see the vertical movement but the time saved in setting the Ronin and the cost savings made this the right tool for this job despite it’s limitations. A steadicam would have given us slightly more elegant moves but there wouldn’t have been much in it and the loss of the second camera would have had a huge impact.
The second film was a trail for Discovery Channel to promote a series of VE day films. The director, Zeliha Bozkurt, went for a bold one shot treatment. We were to move through a living room seeing props that connected with a radio broadcast of some key moments throughout WWII.

Set picture, Discovery trail

Set picture, Discovery trail

Crew from The Lighthouse reunite for this trail
The room is devoid of people until a reveal at the end (ut oh, sorry, plot spoiler). To complicate things we needed to make sure this move is complete within a 40 seconds. The set was slightly oversize but nowhere big enough for a dolly, there was a long lateral move with no people in shot so Ronin was out, the shot required a camera height from knee to head so Steadicam was out, the only choice left was an AR rig. These are brilliant tools. It is basically a jib arm mounted on a steadicam vest which allows the camera to move between floor level to about 2 meters whilst the steadicam op moves around as normal. If you ever need one Simon Wood is your man, not only a magnificent operator but also a true gent. Here’s the film;
If we had booked a Ronin for this job we would have all been cursing it and indeed I would be one of those people moaning that it wasn’t a steadicam. That in no way means the Ronin or MOVI aren’t great tools, they just have different characteristics. There have been plenty of times that I have had to redesign shots because we just couldn’t get the steadicam around a tight corner whereas a Ronin would easily have fitted. In fact, I have just finished another job for the National Trust where we ended up using a Ronin for that exact reason, some of the spaces were so tight that we couldn’t accommodate the footprint of a steadicam. We did also have some long moves along straight corridors where the Ronin’s up/down movement would have been obvious so for these we stood the Ronin op on a flatbed dolly with soft wheels which worked well. Anyway, I digress, the point I was making is that as DoP’s we need to know the tools. We are blessed with new fantastic tools all the time, it is our responsibility to make sure that we use the right ones for the right jobs. However cool, wacky and creative it sounds I am not going to bang in a nail with a jelly.
Variety is the spice of life
One of the things that I love about being a DP is how you are constantly using and adapting what you know to find solutions to questions you haven’t been asked before. Does that make any sense? I’m not sure, however I do know that recently I was asked to shoot some models (as in miniatures, not people!) and make them look like models but to keep a real world feel to the atmosphere within the model. I have shot miniatures before as second unit DoP on some of the features but the aim was obviously to pass them off as real world, this was very different as the aim was to keep both the real world elements and the model elements. Our model shots had to cut into tilt and shift time-lapses taken in Dubai by Nic Cornwall of Little Big Fish Films. His brief to me was to keep the essence of the environment but not compromise the charm of the models. Here’s a couple of frame-grabs of the tilt and shift material that we were asked to match.

Our model shots inter-cut with with these tilt and shift shots

Our model shots inter-cut with with these tilt and shift shots

Our model shots inter-cut with with these tilt and shift shots

Our model shots inter-cut with with these tilt and shift shots
As you can see the scale of the tilt and shift was quite extreme and with this in mind the model maker and Nic decided to use a very small (or big – depending on what way you look at it?!) scale of model, the scale was 1:87 so our figures were barely 2 cm tall. This helped keep the detail down on the figures also which was part of the charm. We used the same tool that they had shot the time-lapses on, a Canon 5D but a very different lens. Whereas the time-lapses were shot using ultra wide lenses we opted for a 100mm macro, with a couple of the wider shots made on a 50mm. Many of the tilt shift sequences were shot as physical time lapse with an intervelometer but we decided that our shots suited being shot in standard 25fps motion. The time-lapse motion combined with the raw feel of the models felt like an unnecessary distraction.
So what did we do to set the tone of the models in the real world? Firstly, whenever possible we used practical effects such as water sprayers to simulate grass sprinklers and mini projectors in the classroom. I treated these as if they were in the real world, so for the sprinklers, I back-lit heavily and for the classroom I darkened off the main space and used the projection to partially light the classroom. We did cheat heavily with the projection as we back projected in the wide shots so that the light from the projector played on the pupils faces but we also front projected for a different angle so that the projector would flare down the lens. This worked very well as the flares from the projector actually took on the shape and colours of the animation we were projecting.

Model with water and flare

Using natural source lighting

Using flare from the projector

Using layers to add depth
We also tried to create as much depth as possible by adding in foreground detail. This helped give the model a feeling of space and distance that was more in line with how a real location would exist. Again we used flares to add to the atmosphere and texture and help sell the shots. Finally, the lighting, 2 of the sets were exteriors, one was day time interior and one was night time interior. I choose lights that would give very clean shadows and were in scale for the models, namely dedos. We also had light panels to give a general ambience. The dedo light was about the right size to approximate the sun when scaled up and can give a very crisp light as it is so focusable.

High contrast office environment

Creating hard ‘sun’ like shadows

High contrast office environment
These worked really well and once again my basic premise was to light as if the locations were real so for example in the classroom all the ambience comes from the window and the key light for the pupils from the projector. We had one scene on the solar farm where we needed to see the sun go down. To achieve this we cut a hole in the background which was just smaller than a dedo. We shone a dedo through this and moved the whole backing down through shot creating the feeling of the sun going down as the flare moved across the lens. We then dimmed up a cool light panel to create the moon ambiance. All we were doing was trying to replicate what would happen if we scaled everything up by 87 times and it proved very effective.

Sun setting
It really is this kind of problem solving that I love, where you use and adapt the experience you already have to extend its purpose to new scenarios. I can’t ever imagine getting bored of this job! Thanks again to Nic at Little Big Fish Films for bringing this project to me and allowing the use of the stills.
New Drama and Commercials showreels
Well, as is normal for this time of year I’ve had a bit of time to get things back in shape. This translates roughly to ‘doh, bloody quiet isn’t it!’ Still, much to my relief, the phone has started ringing again and some interesting films are bubbling away now which will be great. I have seen the first cuts of The Lighthouse, the film I shot at the tail end of last year, and it all looks very promising. In fact, and I’m not one for doing this, but I’d say it could be a real cracker. Chris Crow, the director, with editor John Gillanders, have managed to create a daunting atmosphere and I can’t wait to start hearing the score and dub. So, what have I done with all my time? Well I’ve managed to get hold of some of my recent work and have cut new showreels for drama and commercials. They are on the drama and commercials pages on the site but just to make it doubly simple I’ll add them below also. I hope you enjoy them, it was really nice to look back at some of the work I did last year and it reminded me of all the fun we had making the films.


Recent Comments